Introduction #
The employee feature allows you to create employees for your store, communicate with those employees, and assign permissions and roles for the software.
The Employees feature can be found in the left menu.

Create an Employee #
Navigate to the Employees main feature page.

Click + New Employee in the top right corner.

There are several sections of information that can be filled in for a new employee. The required information is in red.
Note: Sometimes, you will need an employee with identical permissions and login times, in such cases you do not have to create a new employee from scratch. See Clone an Employee below for more details.
Employee Basic Information #
First and Last Name
When creating a new employee you must at least enter a value for their first name. The last name is optional but highly recommended to avoid confusion with common first names.
E-Mail
An email is required for employees. Entering an email gives you a way to easily contact the employee. This is also the email address that will be used for employees that need to recover passwords.
Phone Number
A phone number is not required but is recommended for employees.
Select Image
You can associate an image for an employee.
Address Information
Standard address information for employees can be entered here.
Comments
Add any additional information you may want to keep for the employee such as notes about availability or anything else. Only those with designated permissions will be able to view employee comments.
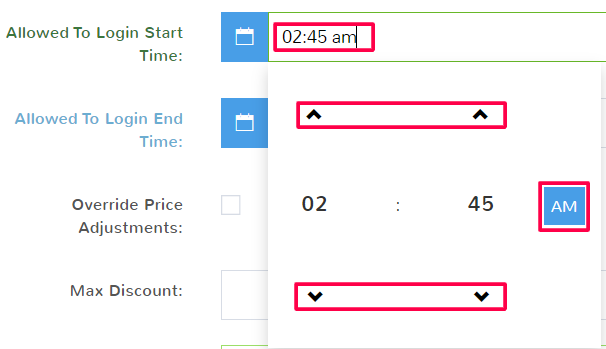
Allowed to Login and End Time
This allows you to set the earliest time an employee is allowed to log in to the program to start work and the latest time they are able to sign out of the program at the end of the day. This helps prevent employees from being able to log in outside of work or during hours when they are not being supervised for work.
Click in the fields and select the times you want employees able to work in the system using the arrows. To change from AM to PM, simply click the box and the value will toggle back and forth.
Override Price Adjustments
By default, employees cannot change the price of items at the sale. If you would like employees to be able to override prices during sales, enable this feature.
Max Discount
If an employee has been enabled to override price adjustments, then this is the maximum discount percentage they were allowed to give.
Commission Information
If you do not have commission rates for your employees, or would like to leave the global commission rates as the default you can leave this value at 0. If you would like to set up a commission rate for this specific employee, see the documentation here.
Hourly Pay Rate
Enter the employee’s hourly wage here. This option will only display if you have enabled the time clock feature in KPOS. For more information on the time clock, see the documentation here.
Hire Date
Click the field to select the date an employee was hired.
Birthday
Click the field to select the employee’s birthdate.
Employee Number
Here you can record any Employee Number your company may assign.
Language
Select the employee’s language here. The software interface will switch to the language chosen.
Default Register
By default, employees have to select a register when they log in. If you would like an employee to be assigned to a specific register, click the dropdown and select from the available registers. Use caution when choosing this, an employee will automatically be signed in with that register when they log into the system.
Files #
Here you can add up to five files that are relevant to your employee, these can be their job description or any other relevant paperwork.
Employee Login Info #
Username
This is a required field and is important that an employee remembers to login with.
Password fields
This is where you can enter an employee’s password, you are asked to enter it twice to ensure there are no typos and that the employee will be able to successfully log in.
Force Password Change Upon Login
By default this option isn’t checked, this means that an employee can continue to use the password you set for them whenever they log in. If you check this box then an employee will be prompted to create a new unique password after they log in with the preset one.
Always Require Password When Switching User
You may have several employees at your store that may use the same device as shifts change. By default, this option is not selected, which means that the device may save the login information for the different users and they will be able to switch from one account to another without being prompted to log in.
It is recommended that you select this option to avoid employees accidentally selecting the wrong user to sign in as because they will have to enter a password to log in again.
Dark Mode
Dark Mode is a setting that will adjust the system displays to be more muted, darker colors.
Inactive
If an employee will not be at work for an extended period of time and you do not want them to be able to log in, check this option to lock their account. Even if the employee has the correct password, they will not be able to log in to their account if they are marked Inactive.
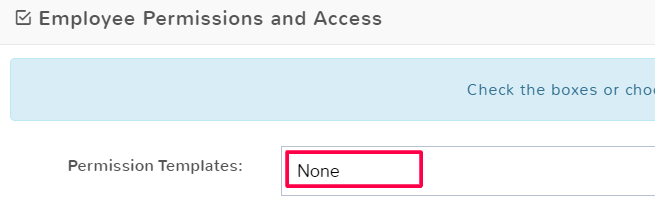
Employee Permissions and Access #
Permissions determine what an employee can view and what actions they can perform within the software.
The easiest way to handle permissions is to create a Permission Template based on an employee’s role and apply that template to new employees. You can select a permission template from the field dropdown in an employee record. More information can be found about Permission Templates here.
Permissions are grouped by program features such as Customer, Items, etc. By default, no permissions are selected when creating a new employee. Checking a box will allow the employee to perform the action described. If you check the box at the top of a section, it will select all of the different permissions in that set.
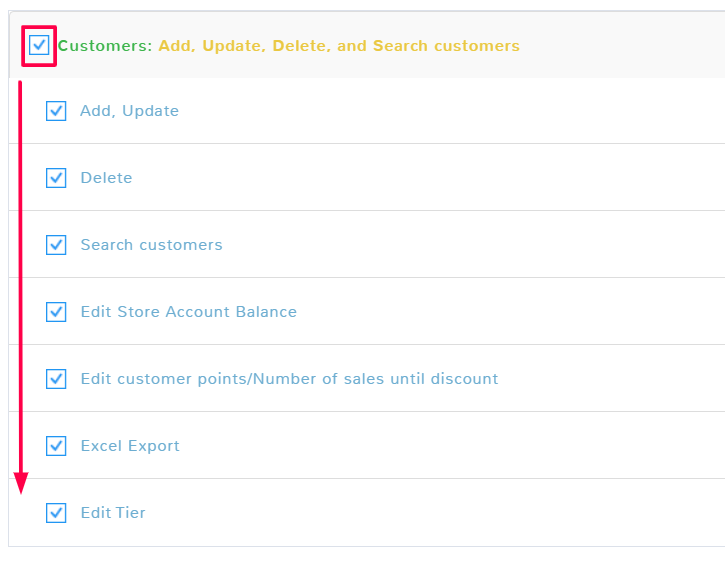
If an employee is having difficulty with a task in the program, always check to make sure that it’s not a permissions problem.
Once you have finished entering the employee information, click Save in the bottom right.
Clone an Employee #
You may not want to create a new employee from scratch. If there are employees who you want to have the same permissions and access, the same login and out times, and the same discount and commission rates, you can instead clone an existing employee record.
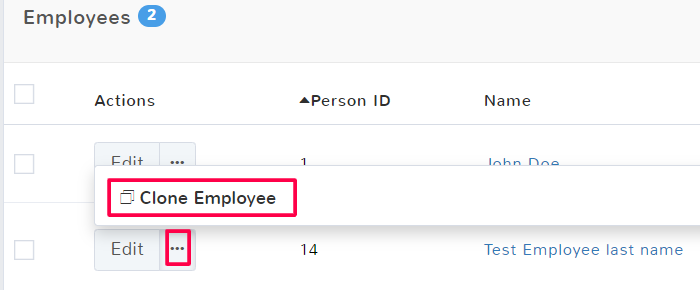
To clone employee information to start a new employee record, navigate to the Employees main feature page.

Once the page opens, locate the employee you want to copy the information for and in the Actions column, click the ellipses (…) and select Clone Employee.
A popup will ask if you are sure that you want to clone the employee record, select OK.
You’ll be brought to the Employee Basic Information page, but several fields will already be filled in based on the record you chose to clone. The following information will be copied from the employee record you cloned;
- City, state, zip, and country from the original record
- Login and End Times
- Price Adjustments, Discount and Commission Information, and Hire Date
- Checkbox options for Employee Login Info, but not the username or password
- Employee Permissions and Access section
Any of these fields can be edited, and all of the other sections still need to be filled out for your new employee. Once you have finished, click Save in the bottom right of the page to create the new employee.
Edit an Employee #
To edit employee information navigate to the Employees main feature page.

Once the page opens, locate the employee you need to edit the information for, and in the Actions column, select Edit.
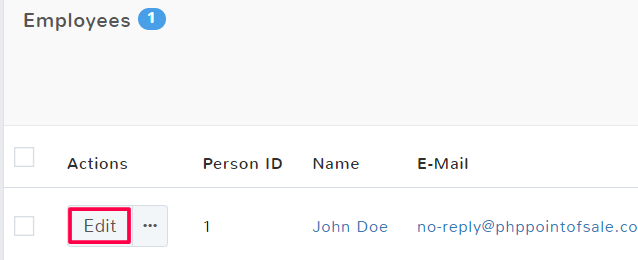
This will open the Employee Basic Information page. Here you can edit and adjust any necessary information for the employee. Select Save in the bottom right in order to keep the changes made.
Delete an Employee #
To delete an employee navigate to the Employees main feature page.

Once the page opens, locate the employee you want to delete and click the checkbox to select their row. Above the employee list, there will be an option to Delete the employee. You can also select multiple employees if you want to delete more than one.

A popup will confirm you want to delete the employee information. Click OK to delete the employee.
Note: Once you have deleted an employee, their record information is still stored in the software. In order to permanently erase their information and free up an employee number for reuse, you will have to complete an additional step. If you deleted an employee by accident, see Reinstate Deleted Employees below to recover the record.
To permanently erase the information, navigate to the employee main feature page.
In the top right click the ellipses (…) to see more options and select Cleanup old employees. This will permanently erase the employee data for any previously deleted employees. This means these employees can no longer be made active again, or have their information changed.

Note: Once you cleanup old employee data, this cannot be undone, you cannot recover the employee information. You also cannot select individual employee records to be deleted permanently, any recently deleted employee record will now be erased when you select this option.
A popup will ask if you are sure you want to remove all deleted employees from the program.

Select ok to permanently erase the data.
Reinstate Deleted Employees #
If you accidentally deleted the wrong employee you can undo the mistake so long as you have not selected to clean up old employees. To do this, navigate to the Employees main feature page.

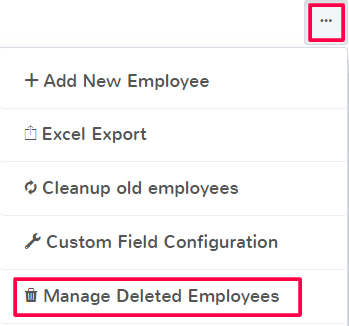
In the top right click the ellipses (…) to see more options and select Manage Deleted Employees.
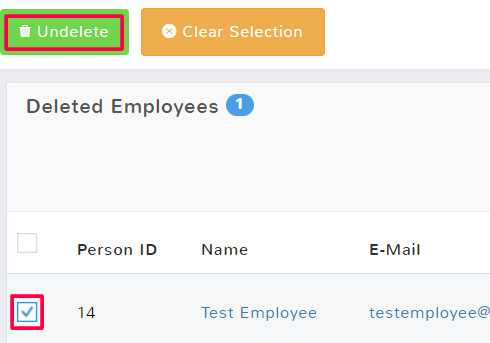
To reactivate an employee and remove them from the deleted section, click the checkbox to highlight the employee row. You can select more than one if there are several you wish to undelete. A menu will populate above the deleted employee list, and select Undelete.
Click Done to return to the normal employee feature page.


