Introduction #
Item kits are for when you have one or more items at a specific quantity that you want to be sold together. For example, you may sell a baseball starter kit that has a glove, bat, and baseball. Rather than have to ring out and check out each of the individual items at checkout, you can just create an item kit containing the products.
Item kits allow you to still keep track of your individual inventory as it assumes the kits are put together at your store with your inventory items.
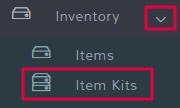
The item kits feature can be found by clicking Inventory in the left menu and then selecting Item Kits:

Create an Item Kit #
Navigate to Inventory in the left menu and then select Item Kits.

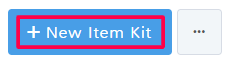
Once the page opens, click the + New Item Kit button in the top right.
This opens the New Item Kit page where you can fill out all the information for your kit in the different tabs. Any field in red is a required field, a breakdown of the different tabs can be found below.
Item Kit Info #
Item Kit Name
This is the name you want your new item kit to be identified by in the system and for sales.
Barcode Display Name
Usually a shortened version of the item kit name that will print on barcodes.
Category Fields
For information on item categories, see the documentation here.
UPC/EAN/ISBN
Relevant item identification number.
Product ID
An identification number for the item kit in your store.
Manufacturer
Select the manufacturer of the item kit. See the documentation here for more information on manufacturers.
Tags
Select or add relevant tags to the item kit. See the documentation here for more information on tags.
Item Kit Description
This area allows you to create a short description of the item kit to help you identify the contents.
Information Popup When Adding to Sale
If there is something a cashier needs to know about an item kit when processing a sale, enter that information here so it pops up on the cashier screen at sale.
Inactive
Select this if the item kit is no longer a currently used product sold at your store.
Is Favorite
Select this if you want the item kit to show up in the Favorited section of the product grid. This can make it easier to quickly find an item when you do not remember the full name or ID to search by.
Is Barcoded
By default, the software assumes that items coming into your inventory during receiving will need to have a barcode printed and applied to it. If you select this option, it is because you do not need to generate barcodes for receivings because the items are already barcoded.
Default Quantity When Selling or Receiving
By default, the software assumes that only 1 of an item kit is being sold or brought in with receivings. If you need to adjust that number because you only sell an item kit in packs of 3 or receive them in groups of 4, then enter the relevant number here.
Modifiers
Here you can select modifiers that might apply to your item kit. For more information on modifiers and how to add more modifier options, see the documentation here.
Items #
This is the section where you can add items to your item kits. There are three main things that can be done in this tab:
Add Item
Start typing in the field to see a dropdown of the matching items in your store. Select the applicable item.
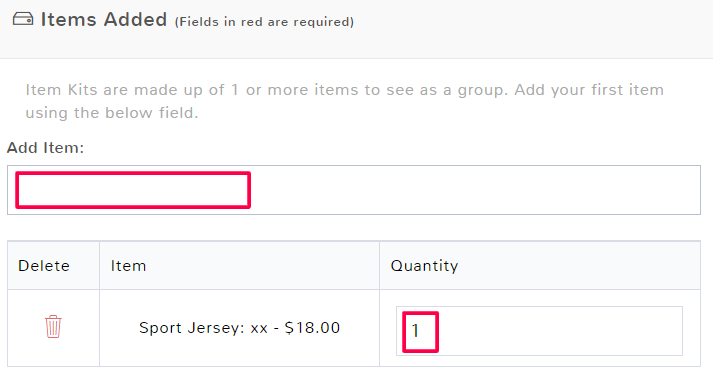
Quantity
Once you’ve added an item, you will see it appear in the list below. In the right column, you can adjust the number of that item that is part of your item kit.
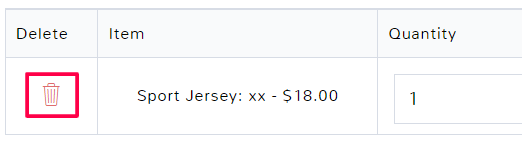
Delete
If you have added an item to an item kit by mistake, you can click the trashcan icon in the left column to remove the item.
Pricing #
Note that any pricing entered here will apply to item kits across all locations. In order to customize pricing for items at a specific location, navigate instead to the Locations tab and fill out the specific pricing information desired for the location.
Dynamic Pricing
By default, there are options to set simple costs and selling prices for your item. However, if you want the prices to be a result of different tiers or other markup and downs, then simply click Dynamic Pricing, and the cost and selling price options will disappear.
Cost Price (Without Tax)
This is the dollar amount that the item costs you as a business to purchase. This is one of the required fields for every item and is useful when running reports.
Calculate Suggested Price
Clicking this option will take the respective cost price of each of the items in the item kit and multiply it by the quantity of each item to give you the total cost price of the items used to make your item kit.
Selling Price
This is the price that you will sell the item to a customer unless another special pricing is applied to it. If there is a special price on an item, then the special price will override the selling price, so be careful when setting further pricing.
Calculate Suggested Price
Clicking this option will take the respective selling price of each of the items in the item kit and multiply it by the quantity of each item to give you the total selling price of the items used to make your item kit.
Disable From Price Rules
This will prevent price rules from being applied to this item kit, even if it fits one of the criteria for a price rule.
Allow Price Override Regardless Of Permissions
This will allow an employee to override the item price at sales regardless of what level of permissions they were given when their employee account was created.
Prices Include Tax
If you have already included tax in the prices you entered for the item, then check this box to avoid tax being calculated for it at check out.
Only allow Items To Be Sold In Whole Numbers
While an item will default be sold in a unit of 1 when making a sale, there is the option to change the quantity sold as smaller sections such as a half (.5). You may want this option available if you are a pizzeria and customers can buy half a pie. If you only have items that can be sold as whole units, such as cell phones, it is recommended you check this box to prevent any mistakes at checkout.
Change Cost Price During Sale
Checking this will allow you to adjust the cost of an item when making a sale. This will not permanently change the cost of the item for future sales and will only apply for reporting purposes to the sale being made at that moment.
Price Tiers
Any price tiers that you have created for your stores will appear as options to customize pricing for item kits. For more information on price tiers, see the article here.
Override Default Commission
If you have special commission rates that apply to this item, you can click the checkbox to see the customized options. For more information on commissions, see the article on commissions here.
Override Default Tax
If you have items with unique tax rules, you can override the defaults by clicking the checkbox. This will open up tax options and customizations for you to work with. For more information on taxes see the documentation on taxes here.
Images #
This is where you can attach images to an item kit to make it easier to identify. Images, unless otherwise selected in your store configuration, will show on the sales grid.
To add an image select Choose file and upload an image from your device.
To remove an image from an item kit, click the X in the top right of the image box.

Locations #
If you have multiple locations, you can adjust the way the item kit appears in different locations.
Hide From Grid
Select this option if you do not want the newly created item kit to appear in the sales grid. This means that a cashier would have to scan a barcode or know the name of the item kit to add it to a sale.
Pricing Options
The remaining pricing options for Locations are the same as the above Pricing tab. The only difference is that any information entered in the Location tab only applies to the specified store location. Pricing information entered on the Pricing tab applies across all locations unless overridden for a specific location.
Edit an Item Kit #
To edit an item kit, navigate to Inventory in the left menu and then select Item Kits.

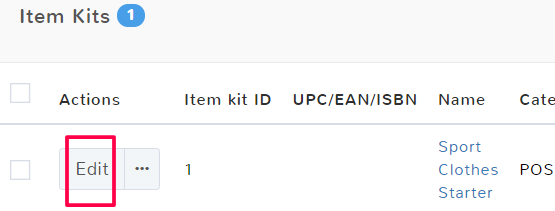
Once the page opens, locate the item kit that you need to edit the information for, and under the Actions column, select Edit.
This will open the Item Kit Information page. Here you can edit and adjust any necessary information for the item kit. Select Save in the bottom right in order to keep the changes made.
Delete an Item Kit #
To delete an item kit, navigate to Inventory in the left menu and then select Item Kits.

Once the page opens, locate the item kit you want to delete and select the checkbox to select the row. You can select multiple rows if you want to delete more than one item kit at a time. Above the item kits list, there will be an option to Delete the item kit.
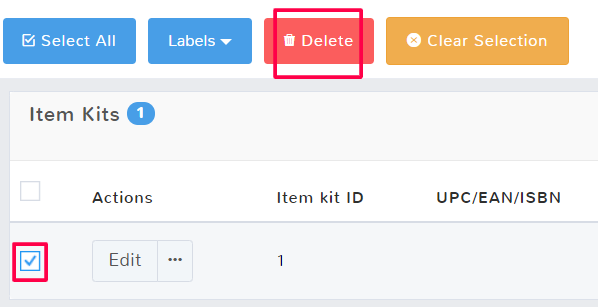
A popup will confirm you want to delete the information. Click OK to delete the item kit.
Once you have deleted an item kit, the information is still stored in the software. In order to permanently erase the information, you will have to complete an additional step.
Note: Once you cleanup deleted item kits data, this cannot be undone, you cannot recover the information. You also cannot select individual item kits to be deleted permanently, any recently deleted item kit will now be erased when you select this option.
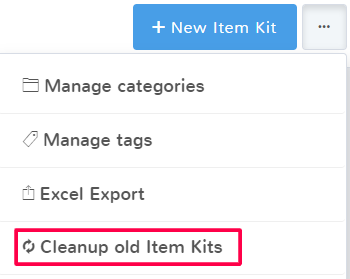
To permanently erase the information, navigate to Inventory in the left menu and then select Item Kits.
In the top right click the ellipses (…) to see more options and select Cleanup Deleted Item Kits. This will permanently erase the data for any previously deleted item kits. This means these item kits can no longer be made active again.
A popup will ask if you are sure you want to remove all deleted item kits from the program. Select ok to permanently erase the data
Manage Deleted Item Kits #
If you accidentally deleted the wrong item kit, you can undo the mistake so long as you have not selected to cleanup deleted item kits. To undelete an item kit, navigate to Inventory in the left menu and then select Item Kits.

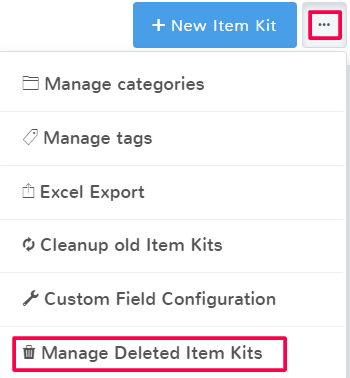
In the top right click the ellipses (…) to see more options and select Manage Deleted Item Kits.
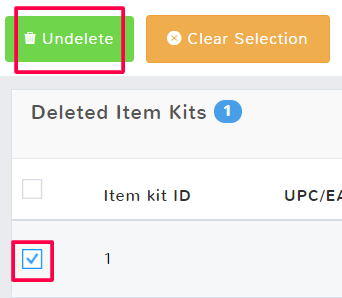
To undelete an item kit and remove it from the deleted section, click the checkbox to highlight the row. You can select multiple rows if you want to do more than one item kit at a time. A menu will populate above the list of deleted item kits, select Undelete.
Click Done to return to the normal item kits feature page.


