Introduction #
The customer feature allows you to keep track of who spends money at your store and how to keep in contact with them. Correctly filling out customer information and keeping track of sales can help you come up with new and creative promotions and rewards for loyal customers.
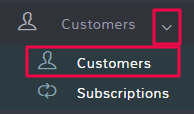
The customers feature can be found in the left menu by clicking Customers and then the Customers sub option.

Create a New Customer #
To start creating customers, click Customers in the left menu and click the Customers sub option.

Once the page opens, click the + New Customer button in the top right.

This opens up the Customer Information page where you can fill out all of the customer details. Any field in red is a required field.
First and Last Name
When creating a new customer you must at least enter a value for their first name. The last name is optional but highly recommended to avoid confusion with common first names.
E-Mail
An email is not required but is recommended for customers. Entering an email gives you a way to easily contact the customer and allows you to auto email receipts to them in the settings below.
Phone Number
A phone number is not required but is recommended for customers. Entering a phone number gives you an easy way to contact a customer and allows you to send text receipts in the settings below.
Select Image
You can associate an image for a customer to help cashiers recognize and verify customer identities and prevent mix-ups in the case of common names.
Address Information
Standard address information for customers can be entered here.
Comments
A space for extra information pertaining to a customer. There are options to make comments visible on receipts and displaying to customers, so use care when filling out information.
Internal Notes
These are notes that can be edited on the customer profile or even during a sale and that will never display to customers or on receipts.
Company Name
Sometimes clients are actually other businesses. In that case, the first and last name may be the contact person for a business and this is where the business they represent can have their information entered.
Account Number
If you have an account number associated with a customer or business, you can enter that here.
Override Default Tax for Sale
If a customer requires taxes different from your site or product default taxes you can adjust that information here. Check the box in order to select a different tax group for sales involving this customer, or to add a custom tax below. You can select one tax group, or add up to four custom taxes.

For more information on taxes, see the documentation here.
Taxable
By default, this box is checked and a customer is considered taxable. If you uncheck this box, a new field will appear below it for you to enter the customer’s Non Tax Certificate Number.

Tier Type
If you have a customer rewards program, a tier type is how you would apply this to individual customers. Click the field to select the appropriate tier from the dropdown menu, this will apply this tier’s discount to any sale associated with the customer.
For more information on tiers and creating them, see the documentation here.
Message to Show when Adding Customer to Sale
Here you can enter a message that will display to a cashier when a customer has been associated with a sale. For example, you may want to notify the cashier if the customer is a very loyal customer and should be reminded of extra discounts they might qualify for. The message will not display on the customer-facing display.
Auto Email Receipt
Check this box if you want a customer to automatically receive an emailed copy of a receipt at the end of a transaction. A valid email must be entered for the customer in order for this feature to work.
Always SMS Receipt
Check this box if you want a customer to always receive a text message with their receipt information. A valid phone number must be entered for the customer in order for this feature to work. Note that message and data rates may apply, it is usually best to have the customer expressly request this method of receiving a receipt before activating.
Custom Fields
If you have created any custom fields for your customer records, they will show here. For more information on customer custom fields, see here.
Files
Here you can attach up to five files that are relevant to your customer. There is a file size limit of 100MB.
Once you have finished entering the customer information, click Save in the bottom right.
Merge Customer Records #
Sometimes there might be duplicate records for customers. It’s possible that there was a misspelling of a customer’s first or last name the first time it was entered and that later, unable to find the customer, an employee created a second record. This can get confusing when running reports on customer sales and other reports. To fix this problem, you can merge customer records together.
To merge customer records, click Customers in the left menu and click the Customers sub option.

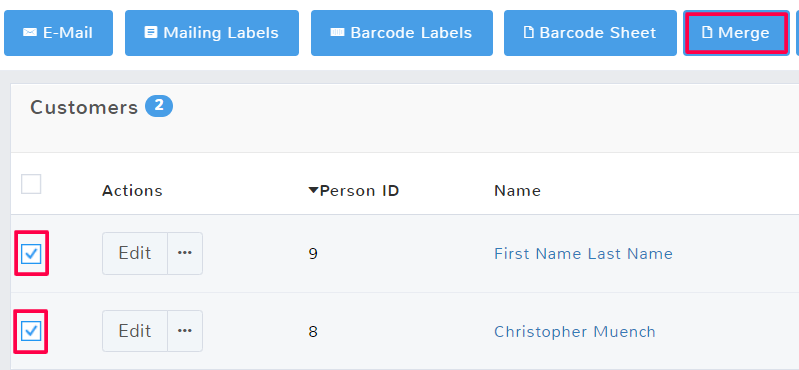
Once the page opens, locate the customers that you want to combine the records of. Select each of the customer rows, and then in the top menu that appears select Merge.
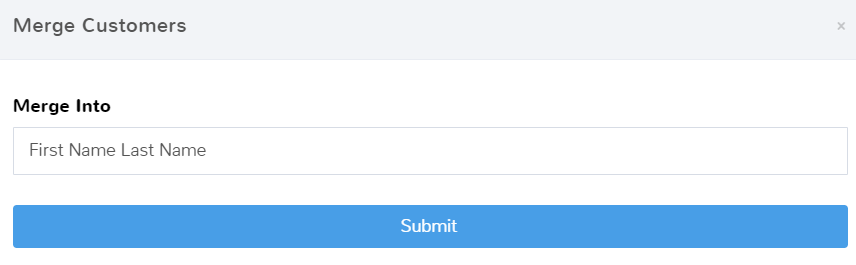
A popup will open asking which customer record you want to become the main customer record that the other record will become a part of. Click the field to see the dropdown of options and select the customer name you want to keep.
Once you have merged customer records, this cannot be undone. Make sure you have triple-checked the records you are merging and have selected the record you want to be the main one before submitting anything.
Once you are done, select Submit.
Edit a Customer #
To edit customer information, click Customers in the left menu and click the Customers sub option.

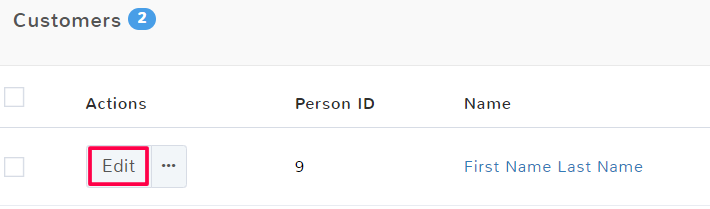
Once the page opens, locate the customer you need to edit the information for, and in the Actions column, select Edit.
This will open the Customer Information page. Here you can edit and adjust any necessary information for the customer. Select Save in the bottom right in order to keep the changes made.
Delete a Customer #
To delete a customer, click Customers in the left menu and click the Customers sub option.

Once the page opens, locate the customer you want to delete and click the checkbox to select their row. You can select multiple rows if you want to delete more than one customer at a time. Above the customer list, there will be an option to Delete the customer.

A popup will confirm you want to delete customer information. Click OK to delete the customer.
Once you have deleted a customer, their record information is still stored in the software. In order to permanently erase their information and free up a customer number for reuse, you will have to complete an additional step. If you deleted a customer by accident, see Manage Deleted Customers below to recover the record.
To permanently erase the information, navigate to the customer main feature page.
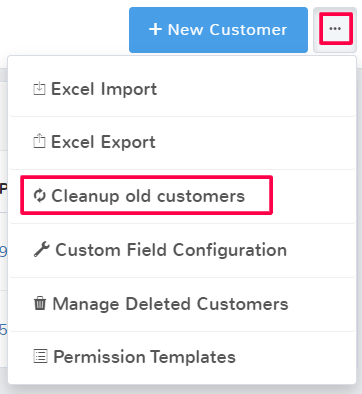
In the top right click the ellipses (…) to see more options and select Cleanup old customers. This will permanently erase the customer data for any previously deleted customers. This means these customers can no longer be made active again, or have their information changed.
A popup will ask if you are sure you want to remove all deleted customers from the program. Once you cleanup old customer data, this cannot be undone, you cannot recover the customer information. You also cannot select individual customer records to be deleted permanently, any recently deleted customer record will now be erased when you select this option.

Select ok to permanently erase the customer data.
Manage Deleted Customers #
If you accidentally deleted the wrong customer you can undo the mistake so long as you have not selected to clean up old customers. You can also edit the details of deleted customers in order to correct any mistakes on reports or records. To do either of these things, click Customers in the left menu and click the Customers sub option.
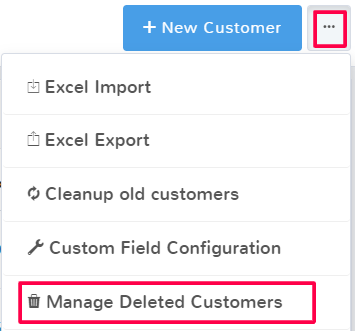
In the top right click the ellipses (…) to see more options and select Manage Deleted Customers.
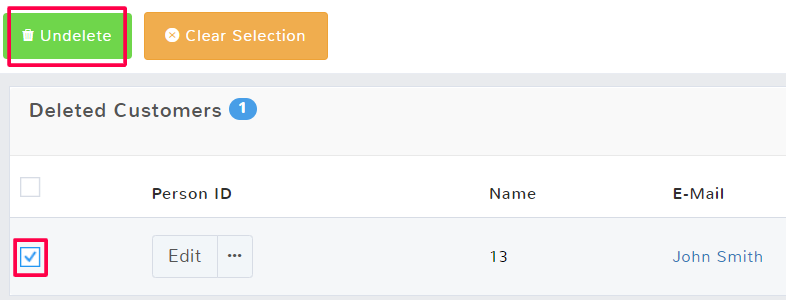
To reactivate a customer and remove them from the deleted section, click the checkbox to highlight the customer row. You can select multiple rows if you want to do more than one customer at a time. A menu will populate above the deleted customer list, select Undelete.
You also have the option to select Edit for any customer that has been deleted and change customer information just as you can for a regular customer record.
Click Done to return to the normal customer feature page.


