Store configuration options make Point of Sale highly customizable. It is important to read this document to better understand how to best implement the application to meet your business needs.
Searching Configuration Options #
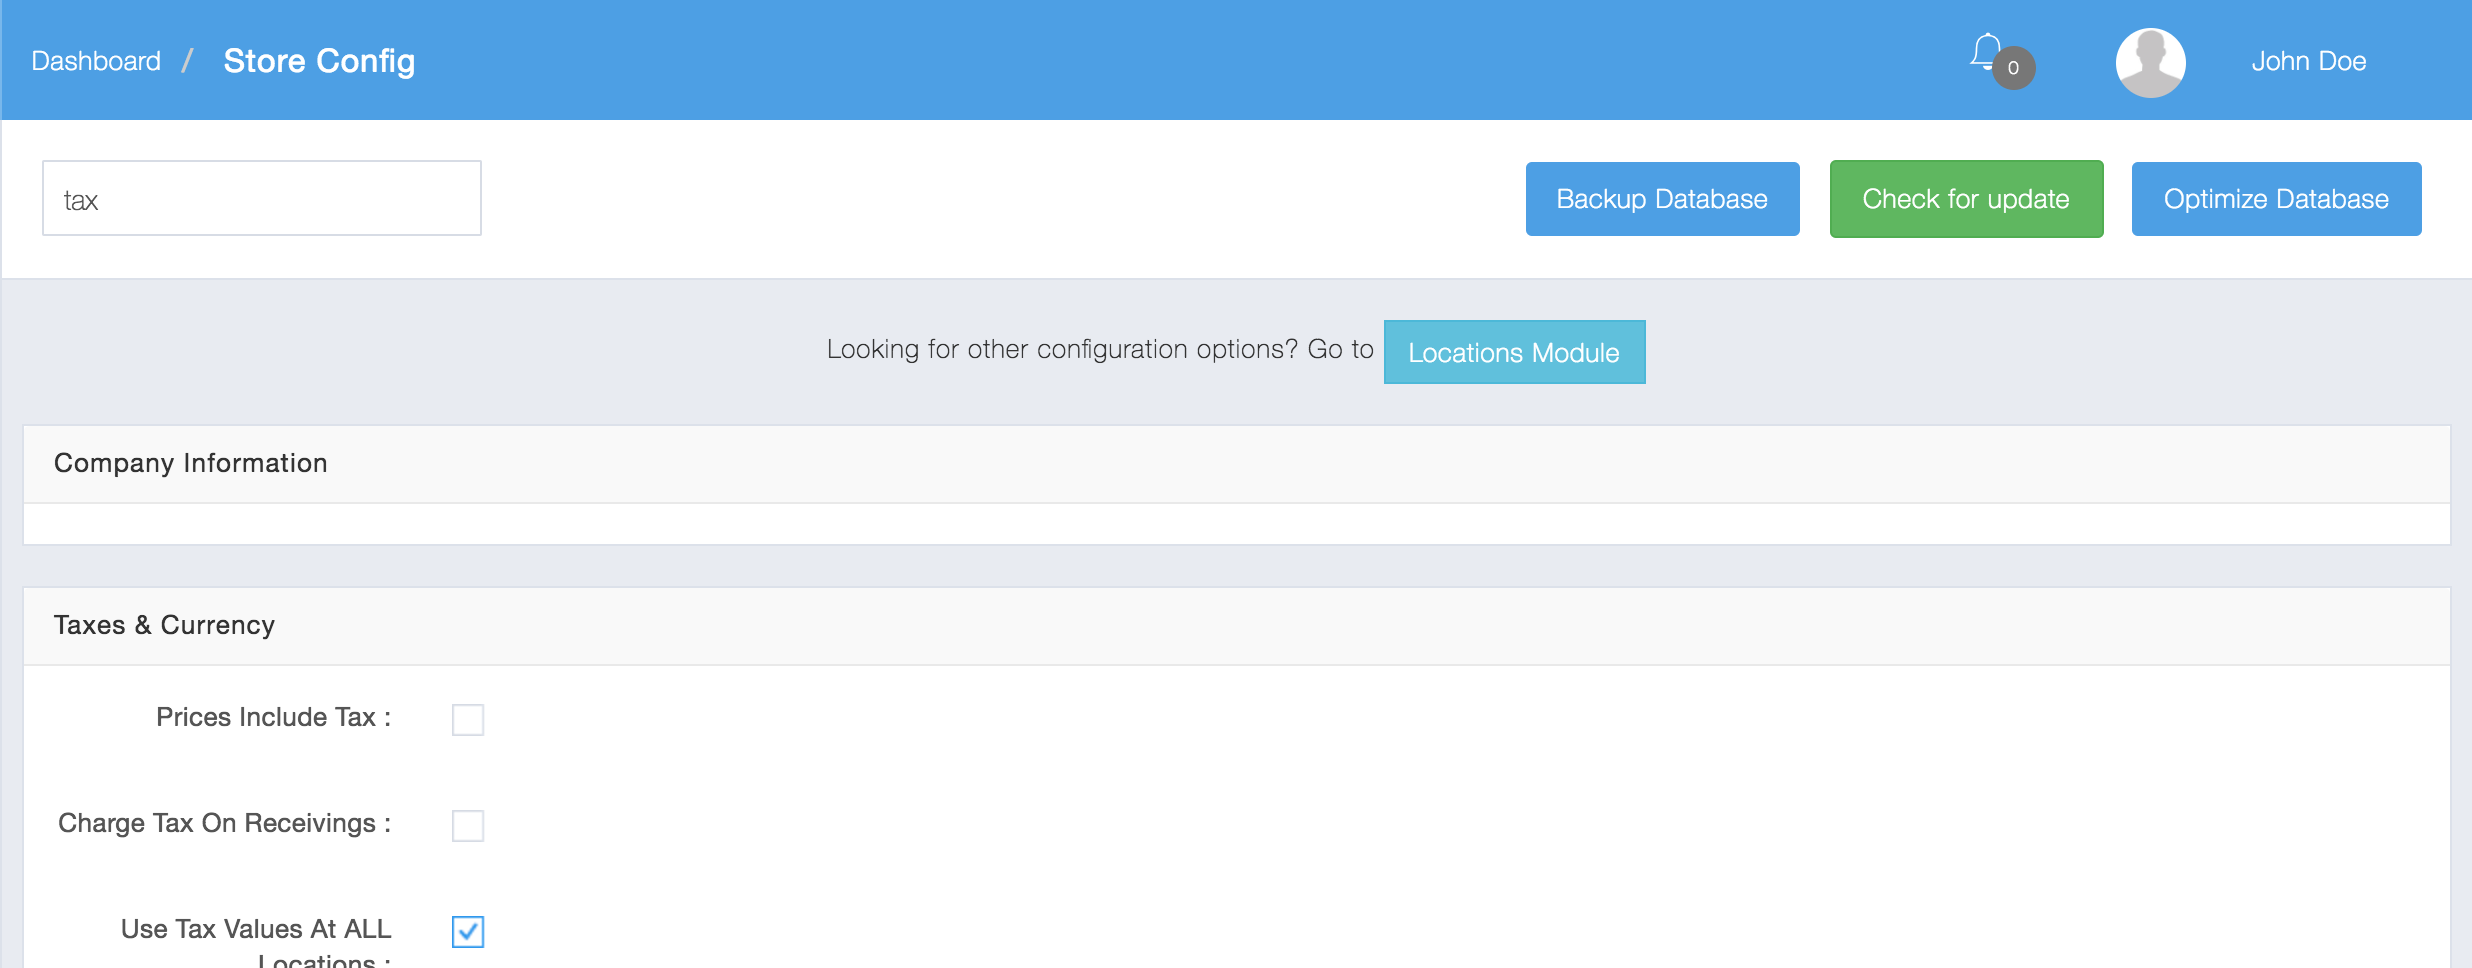
All configuration settings are easily searchable using the search feature at the top of the Store Config Page.
Company Information #
Company Logo: #
This is your company’s logo that will appear on a customer receipt. It also shows on your login screen.
Delete Logo: #
This will remove your logo from the system.
Company Name (required): #
The name of your company. This shows on receipt and the title bar of browser.
Website: #
The website of your company; this shows on your receipt.
Taxes #
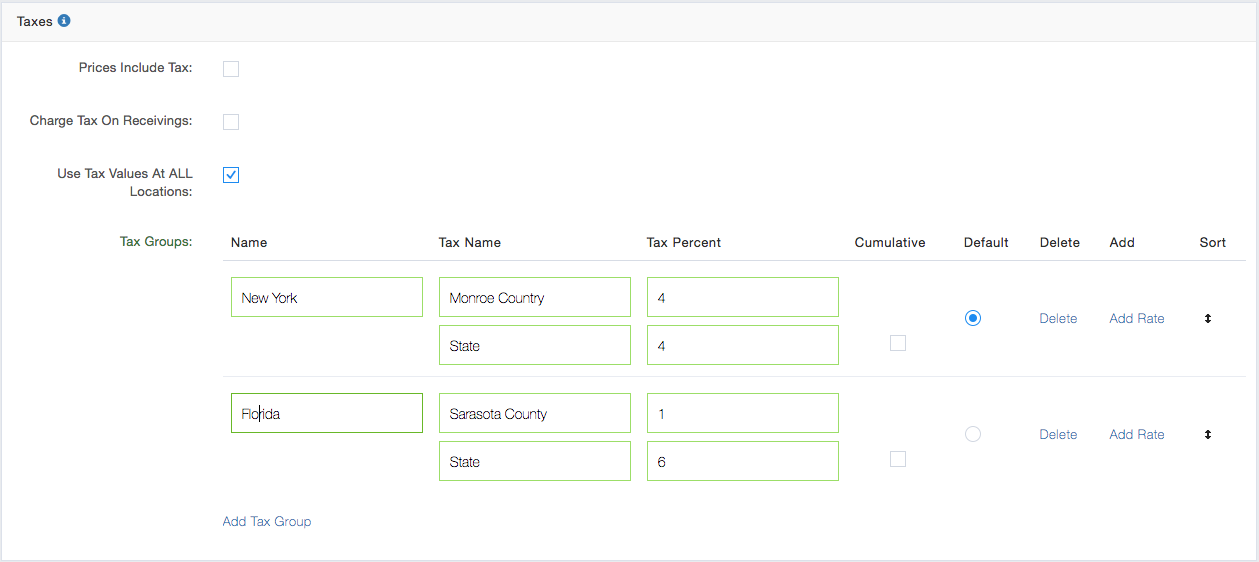
Prices Include Tax: #
If this is enabled new items will default to include tax in price. This setting does not affect existing items.
Charge Tax On Receivings: #
If this is enabled tax will be charged on receivings. By default no tax is charged. The value for taxes is your store config values.
Use Tax Values At ALL Locations #
This overrides the tax settings at the location level to force it to use the taxes defined at the global application level.
Tax Groups: #
You can make Tax Groups that can be assigned to items, item kits, suppliers, customers, and delivery zones, and locations.
Tax 1 Rate: #
The rate of your 1st tax
Tax 2 Rate: #
The rate of your 2nd tax.
Tax n rate…: #
You can have up to 5 taxes in the system. You can see the other 3 taxes by clicking show more.
Currency #
Currency Symbol: #
This defines the symbol used throughout the program such as on receipts and sales interface.
Currency Code: #
This is an optional a label for the default currency. An example would be USD for US Dollars
Exchange Rates: #
This table defines alternate currency denominations that will be accepted at time of payment while finishing a sale.
Currency Symbol Location: #
Before or after The Number
Number Of Decimals: #
This decides how many decimals to display. The default value of “Let system decide” is recommended. This setting means it will at LEAST display 2 decimals and show more as needed. The other settings enforces the strict amount of decimals chosen.
Thousands Separator: #
The symbol used to separate the output of thousands. Example a “,” would look display like this 1,000 The Default is a ‘,’
Decimal Point: #
The symbol to use for a decimal The Default is a ‘.’
Currency Denominations (for example: 100’s, 50’s, 20’s) #
Custom Denominations can be defined here.
Payment Types #
Payment Types: #
cash, check, gift card, debit, credit card, ebt (if enabled), ebt cash (if enabled)
You can also add additional payment types with this setting.
Default Payment Type: #
The default selected payment type when doing a sale.
Enable EBT Payments #
This enables EBT as a Payment Type
Enable WIC #
This enables WIC as a Payment Type
Prompt For CCV When Swiping Credit Card: #
When swiping braintree or stripe cards it will not process right away unless you put in CCV.
Do Not Force HTTP When Needed For EMV Credit Card Processing #
This setting only applies if you are set up for EVM Card Processing
Price Rules #
Enable Price Rules Dialog: #
This will enable the prompt asking if you would like the system to add the qualifying discounted items to the sale automatically without having to scan them when the customer is eligible for the deal.
Orders And Deliveries #
Do NOT Tax Service Items For Deliveries: #
This means any service item (including the delivery fee) will NOT be taxed
Shipping Providers: #
You can define Shipping providers and their shipping rates. This can be anything you want. These shipping method options appear in the sales interface when adding delivery information to a sale.
Shipping Zones: #
You can also optionally define Shipping Zones if you need to do this for tax purposes or want to charge different amounts for shipping based off geographic distance.
Sales #
Sale ID Prefix: #
An optional prefix that is added to the ID of a sale. This will show up on receipts and reports.
Item ID To Show On Sales Interface: #
This defines the id number to use on sales interface. The options are UPC/EAN/ISBN, Product ID, or Item ID.
Auto Focus On Item Field When Using Sales/Receivings Interfaces: #
When performing a sale after each action the focus of the cursor goes back to the item field regardless which field was edited. The default behavior is to go to the last focused field.
Capture Signature For All Sales #
This will make it required to sign for all sales
Number Of Recent Sales By Customer To Show: #
This sets the number of recent sales that history will show when clicking a customer during sale. To view recent customer history click on the customer that is attached to a sale.
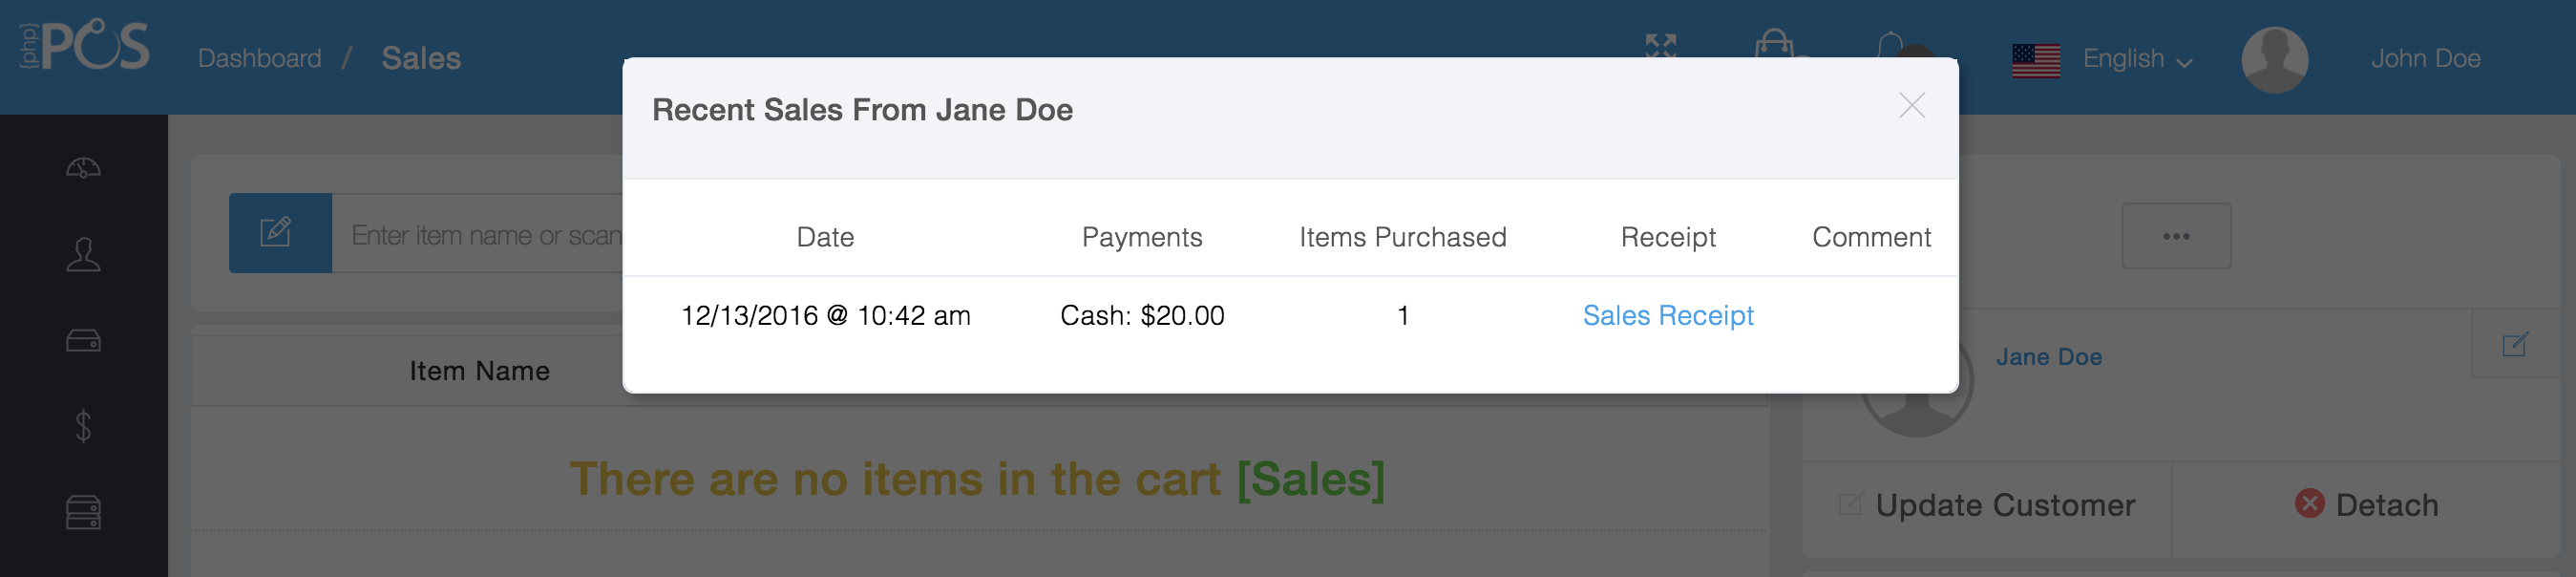
Hide Recent Sales For Customer: #
Prevents recent sales from being shown on sales UI when you click a customer name attached to a sale.
Disable Confirmation For Complete Sale: #
This disables confirmation dialog when attempting to complete sale.
Disable Sale Quick Complete: #
Disables one click to complete sale. This will make it a 2 step process. You will have to add payment first and then complete sale.
Calculate Average Cost Price From Receivings #
Calculate Cost Price Average from Receivings
Averaging Method #
Hide Suspended Receivings In Reports: #
This will not show suspended receivings in any reports.
Track Cash In Register: #
Do Not Show Expected Closing Amount When Closing Register #
This hides how much SHOULD be in the register from the employee when closing the register
This enables cash tracking to keep on top of cash in register.
Disable Giftcard Detection: #
If you check this box the system will not try to auto detect gift card swipes. If this setting is enabled then the system will not parse track data on gift card magstrips that are not used.
Always Show Item Grid: #
Displays item grid by default for sales + receivings.
Hide Out Of Stock Items In Grid: #
Don’t show items that are out of stock for item grid.
Default Type For Grid: Categories or Tags: #
Chooses what appears first when using item grid.
Require Customer For Sale: #
Enabling this option will not allow you to complete a sale unless you choose customer first.
Select Sales Person During Sale: #
Choose a sales person during sale. This can be different than the logged in employee.
Default Sales Person: #
This can be none (requires employee to take action) or the logged in employee.
Commission Default Rate: #
The default storewide Percent Commission.
Commission Percent Calculation Method: #
Change whether commission is calculated based off the Selling price or profit.
Disable Sale Notifications: #
Disables all warning, error, and success messages during a sale.
Confirm Error Messages Using Modal Dialogs #
Presents a modal dialog that won’t let you continue unless ok is chosen. This is to make sure all errors are confirmed on the sales screen.

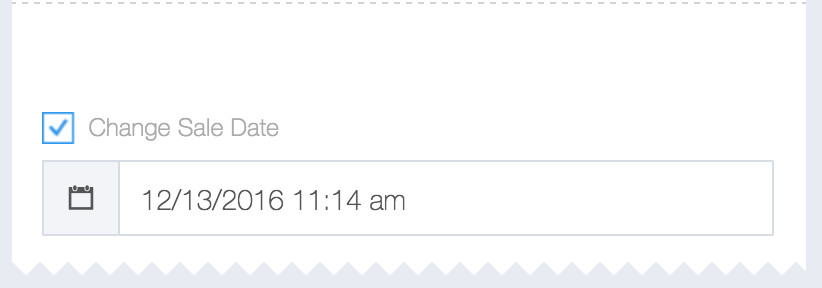
Change Sale Date For New Sale: #
This allows the date to be set for a new sale.
Do NOT Group Items That Are The Same: #
This makes it so each addition of an item that is the same is on its own line. By default it normally just increments the quantity by 1

Do NOT Allow Items To Be Sold Below Cost Price: #
If an item is below cost price it will not allow this to happen. The default behavior is to show a warning.
Do Not Allow Out Of Stock Items To Be Sold #
Out of stock Items will not be sold though the sales interface.
Edit Item Price If 0 After Adding To Sale #
makes the item price editable if it is 0 when added to a sale.
Remind Employee To Open Customer Facing Display #
Shows warning message until customer facing display is opened.
Suspended Sales/Layaways #
Additional Suspended Sale Types #
Here you can create custom suspended sale types. These additional types will act like an estimate (not removing from stock; but will allow you to filter by the type and see). Example use cases are for repairs and creating states such as “Waiting for authorization”, “Parts Ordered” and “in Repair”
Require Customer For Suspended Sale: #
Enabling this option will not allow you to suspend a sale unless you choose customer first.
Override Layaway Name: #
This allows the term “Layaway” to be named whatever you want. This affects the label throughout the system.
Hide Layaways In Reports: #
Hides all layaways from reports until they are completed.
Lock Prices When Unsuspending Sale Even If They Belong To A Tier: #
This option makes sure the prices when un-suspending sale stay what they were entered as instead of re-calcuating tier price.
Change Sale Date When Suspending Sale: #
This changes the sale date each time a sale is suspended. Default behavior is to not change date.
Change Sale Date When Completing Suspended Sale: #
This changes the date when completing a suspended sale. Default behavior is to not change the date of the sale.
Show Receipt After Suspending Sale: #
This shows receipt right after suspending a sale.
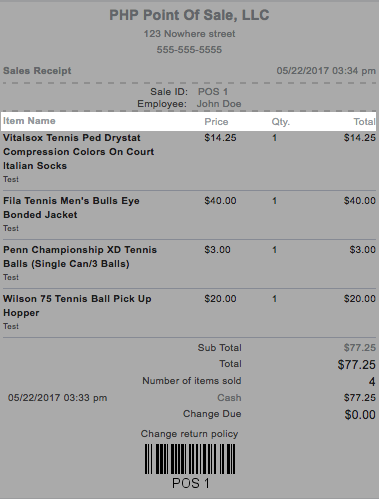
Receipt #
Override Receipt Title: #
This overrides the regular value of Sales Receipt which displays on all receipts. An example of a different title would be “Bill of Sale”.
Email receipt subject #
This allows the email receipt subject to be different than the default of “Sales Receipt”
Show Item Id On Receipt: #
This option will show above column on receipt
Number Of Decimals For Quantity On Receipt #
This will change the number of decimals on the quantity numbers for items. this is useful for scale price embedded barcodes
Hide Description On Receipt: #
This option will hide item description on receipt.
Show Original Price On Receipt If Marked Down #
Print Receipt After Sale: #
This option automatically opens print dialog after a sale.
Wide Printer Receipt Format: #
This option makes the item name and other columns appear on the same line.
Print Receipt After Receiving: #
This option automatically opens print dialog after a receiving.
Hide Signature: #
This will hide the signature capture on the receipt.
Remove Customer Name From Receipt: #
This hides the customer’s name on the receipt.
Remove Employee Name From Receipt #
This removes the employee’s name from receipt
Remove Customer Company Name From Receipt: #
This hides the customer’s Company Name on the receipt.
Remove Customer Contact Info From Receipt: #
This removes address information for a customer on the receipt.
Automatically Email Receipt: #
This changes the behavior to always email receipts when you have added a customer during sale.
Automatically Print Duplicate Receipt For Credit Card Transactions: #
This automatically prints a duplicate receipt for sales with a credit card payment type.
Always Print Duplicate Receipt For All Transactions #
This automatically prints a duplicate receipt for ALL sales
Automatically Show Comments On Receipt: #
This changes default behavior to show sale comments on receipt
Hide Barcode On Receipts: #
Don’t print the scannable barcode on receipt.
Group All Taxes On Receipt: #
Instead of showing each percent; enabling this option would show only one tax amount for the entire sale.
Redirect To Sale Or Receiving Screen After Printing Receipt: #
Goes directly back to sales or receiving screen after printing receipt. This saves a mouse click.
Receipt Text Size: #
Size of text that Prints on receipt. The options are small medium large and extra-large. The default is small.
Hide Store Account Balance On Receipt: #
This hides the customer’s balance on the receipt when using store accounts
You must have store accounts enabled first.
Customer Store Accounts
Round To Nearest .05 On Receipt: #
This rounds all cash sales to the nearest .05. You would check this box if you don’t collect pennies or .01 denominations
Return Policy (required) #
This specifies your store return policy. This text shows up on customer receipts.
Announcements/Specials #
This is additional text to display on receipt.
Profit Calculation #
Calculate Gift Card Profit When: #
This dropdown decides when you record the profit for gift cards. The three options for this setting are: do nothing, redeeming gift card, selling gift card.
Remove Points Redemption From Profit #
This setting will change the default behavior of reports and will remove redemption from profit.
Remove Commission From Profit In Reports #
This setting will change the default behavior of reports and not count commissions toward profit.
Remove Points Redemption From Profit #
This setting will change the default behavior of reports and will remove redemption from profit.
Barcodes #
ID To Show On Barcode: #
This is the default ID to use when printing barcodes.
Include Tax On Barcodes: #
If this setting is enabled prices on barcodes will include tax.
Hide Price On Barcodes #
This removes the price from barcodes that are printed out on labels.
Show Company Name On Barcode #
This shows the company name on barcode
Hide Name On Barcodes #
This hides name of the product on the barcodes
Enable Scale #
You can now use a scale to print the weight of an item in a barcode
See Barcode Printing
Scale Barcode Format #
The UPC barcode format you are using for the scale.
Scale Price Divide By #
options are 1, 10 , 100
Customer Loyalty #
Enable Customer Loyalty System #
To read more about our customer loyalty feature see: Customer Loyalty
Loyalty Program Option #
Simple or Advanced
Number Of Sales For Discount #
This setting only applies to the simple loyalty option
This is the number of sales to qualify for a loyalty discount
Discount Percent Earned When Reaching Sales #
This setting only applies to the simple loyalty option
This is the percent off the sale when a certain number of sales have been made
Spend Amount To Point Ratio #
This setting only applies to the advanced loyalty option.
This is the amount a customer has to spend to receive a point.
Point Value #
This setting only applies to the advanced loyalty option.
This is the amount each point is worth.
Loyalty Points Earned Not Including Tax #
This setting only applies to the advanced loyalty option.
This excludes tax from the calculation of loyalty points.
Hide Sales To Discount On Receipt #
This Hides the loyalty discount on the receipt
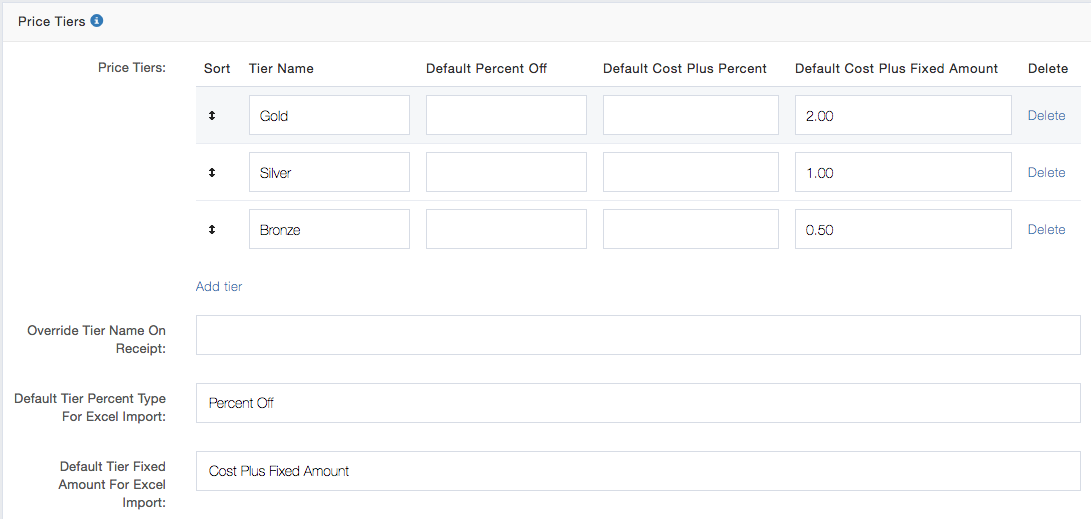
Price Tiers #
Price Tiers #
You can Set up a tiered pricing system. This enables you to set different prices for items based on tiers which are assigned to customers.
Version 15.2 Feature #
You can now specify Cost + a Fixed Amount markup for price tiers.
Example of Price tiers on Sales interface:

Example of tiers in sales interface

Price Tiers
Override Tier Name On Receipt #
You can override Tier names on receipts to be the specified text.
Default Tier Percent Type For Excel Import #
This is the default percent type for Excel Imports for tiers.
The options are Percent Off or Cost Price plus percent
Round Tier Prices To 2 Decimals: #
This is to round tier prices to 2 decimals.
ID Numbers #
You can increase the starting value for auto-incrementing ids. Typically these Ids start at 1 but you may prefer to have item ids start at 1000 instead of item id 1. If this is the case you would change these settings. Otherwise there is no need to change this.
Item ID Auto Increment Starting Value #
The Auto Increment starting value for Item Id
Item Kit ID Auto Increment Starting Value #
The Auto Increment starting value for Item kit Id
Sale ID Auto Increment Starting Value #
The Auto Increment starting value for sale Id
Receiving ID Auto Increment Starting Value #
The Auto Increment starting value for receiving Id
Items #
Number Of Items Per Page (required) #
This limits the number of items to display per page in the items view.
Number Of Items Per Page In Grid (required) #
This limits the number of items per page in the grid view.
Default Reorder Level When Creating Items #
This is the default reorder level when creating new items.
Default New Items As Service Items #
This will make it the default when creating new items to set them as Service Items. A service item is an item without a quantity.
Highlight Low Inventory Items In Items Module #
This makes items with low inventory appear highlighted.
Limit Manual Price Adjustments And Discounts: #
This allows items and item kits to have limits on their pricing as well as their discount
Enable MarkUp Calculator #
This will enable a Markup Percentage Field in the Pricing and Inventory section when creating or editing an item.
Employee #
Enable Time Clock #
This enables a time clock to always display on the top of the screen.
Log Out Automatically When Clocking Out #
Logs out of the system when an employee clocks out.
Enable Fast User Switching #
This removes the requirement for a Password to switch users
Require Employee Login Before Each Sale #
This security feature will ensure that there are no unauthenticated actions
Reset Location When Switching Employee. #
It results the location to the 1st location created in the system when you switch employees. If you do not check this it will keep the same location as previous employee had.
Store Accounts #
Customers Store Accounts #
Enable/Disable Store Accounts for customers. This acts like a line of credit for customers.
Customer Store Accounts
Suppliers Store Accounts #
Enable/Disable Store Accounts for customers. This acts like a line of credit for suppliers.
Disable Store Account When Over Credit Limit: #
If a customer goes over their credit limit; they will NOT be able to charge their store account.
Store Account Statement Message: #
A message that appears on the statement itself.
See Customer Store Accounts
Hide Store Account Payments In Reports: #
If this setting is enabled store account payments will not show up in any reports.
Hide Store Account Payments From Report Totals: #
Store account payments will not be part of total boxes at top of reports.
PayPal.me Username: #
Enter your paypal.me username to allow customers to pay statement via email
Application Settings #
Language (required) #
The language to display system wide.
Date Format (required) #
MM/DD/YYYY, DD-MM-YYYY, or YYYY-MM-DD
Time Format (required) #
The options are Military or Standard time.
Require Https For Program #
This will force the program to use HTTPS for all pages
Test Mode (Sales NOT Saved) #
Sales are not saved while Test Mode is Enabled
Disable Test Mode #
Disable Test Mode ensures that this feature will not be accessible to employees through the “…” button
Enable Sounds For Status Messages #
This enables sounds for any system message or alert. these are messages that appear in the top righthand side of the screen.
Show Language Switcher #
This enables a language switcher in the top right of page next to messages.
Show Clock In Header #
This enables a clock to display on all pages in the top right of page.
Legacy Detailed Report Excel Export #
this enables Reporting view to use an older detailed reports from previous versions.
Overwrite existing items on excel import #
this enables overwriting of items and customers that match on account number or UPC/product id.
Report Sort Order: #
The two options are Oldest first or Newest first
Speed Up Search Queries #
This speeds up search queries but is not necessary with less than 10,000 Items.
Enable Quick Edit On Manage Pages #
This makes the enter key submit an edit on all manage pages such as items, item kits, customers, suppliers.
Legacy Search Method #
This uses the old search engine for all searches.
Include Child Categories When Searching Or Reporting #
This option will make Searching and Reporting search child categories when using filters.
Spreadsheet Format: XLSX or CSV #
This is the file format used for spreadsheet imports and exports.
Warning #
When Using CSV be careful because often times editors like excel will remove leading 0’s from numbers.
Mailing Labels Format #
There are 2 format options for mailing labels, PDF, or Excel.
Session Expiration #
The 2 options are on Internet Browser Close or Specified Time.
Item Lookup Order #
This is the order in which the system looks up an item number.
Email Settings #
Download customers can set up an email address to email receipts and get inventory alerts with these settings. Cloud customers do not need to perform this setup.
Select A Provider #
You can select from the list of presets if you are using these email providers:
Gmail
Office 365
Windows Live Hotmail
Select Other if you are using a different provider
Email Address #
Your email address you want the application to use to send emails with
Email Password #
your Email login password
SMTP Encryption #
SSL or TLS
Mail Sending Protocol #
SMTP, Mail, SendMail
SMTP Server Address #
The URI of the SMTP server
SMTP Port #
The port of the Server (default 25)
Character Set #
Character Encoding
Newline Character #
Newline Character (default \r\n)
CRLF #
Carriage Return Character (default \r\n)
SMTP Timeout #
Default 5 seconds
Ecommerce Platform #
Select Platform #
Currently we support WooCommerce
Store Location #
The Store location to sync inventory with
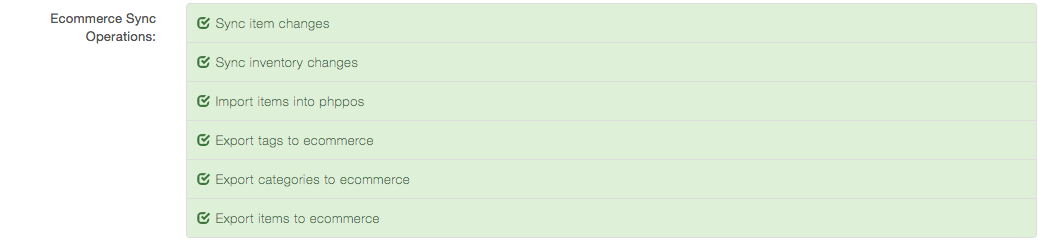
Ecommerce Sync Operations #
Last Sync Date #
The date of last sync with the Ecommerce Platform
Reset E-Commerce #
This button will remove the linkages between woo-commerce and kpos. this is helpful if a sync gets stuck for some reason and needs to be restarted.
Woocommerce Settings #
WooCommerce Version #
Select the version of WooCommerce you are using for your web store
Woocommerce API Url #
This is the API URL. This is usually your store website address.
Woocommerce API Key #
This is the API Key that can be found from the admin page of your WooCommerce Site
Woocommerce API Secret #
This is the API Secret that can be found from the admin page of your WooCommerce Site
For More information on how to set up WooCommerce see: WooCommerce Integration


